


DLink Weather Cam - How To
For those interested in trying a home webcam to upload to WeatherUnderground, but not sure where to start, below are the settings that I used. Maybe of inspiration or help if you decide to try this option. Just look for a camera that has FTP option, as many do. I used a DLink DCS-942L, which is an older camera that I had lying around.
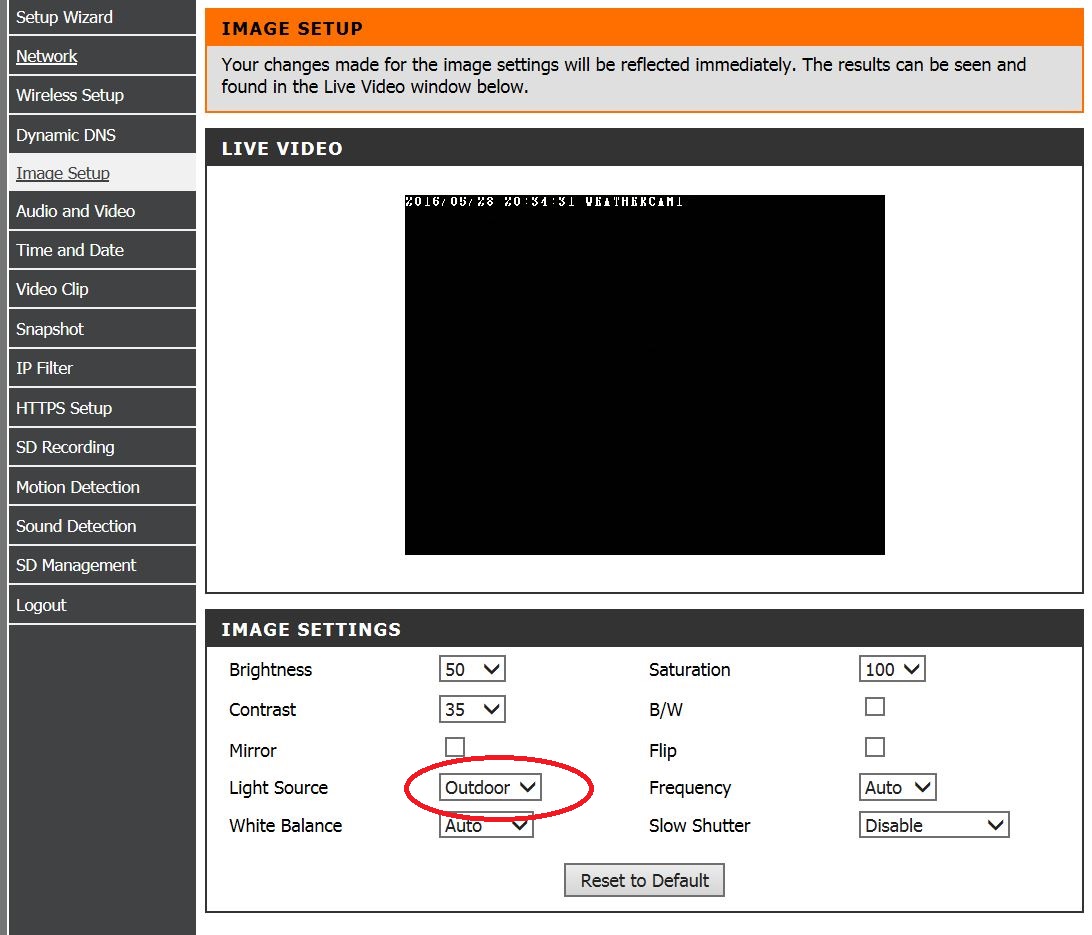
Step 1 - I set the light source to "outdoor". This gave a better picture contrast, given as good as it gets with this low cost camera.
{click photo to enlarge}
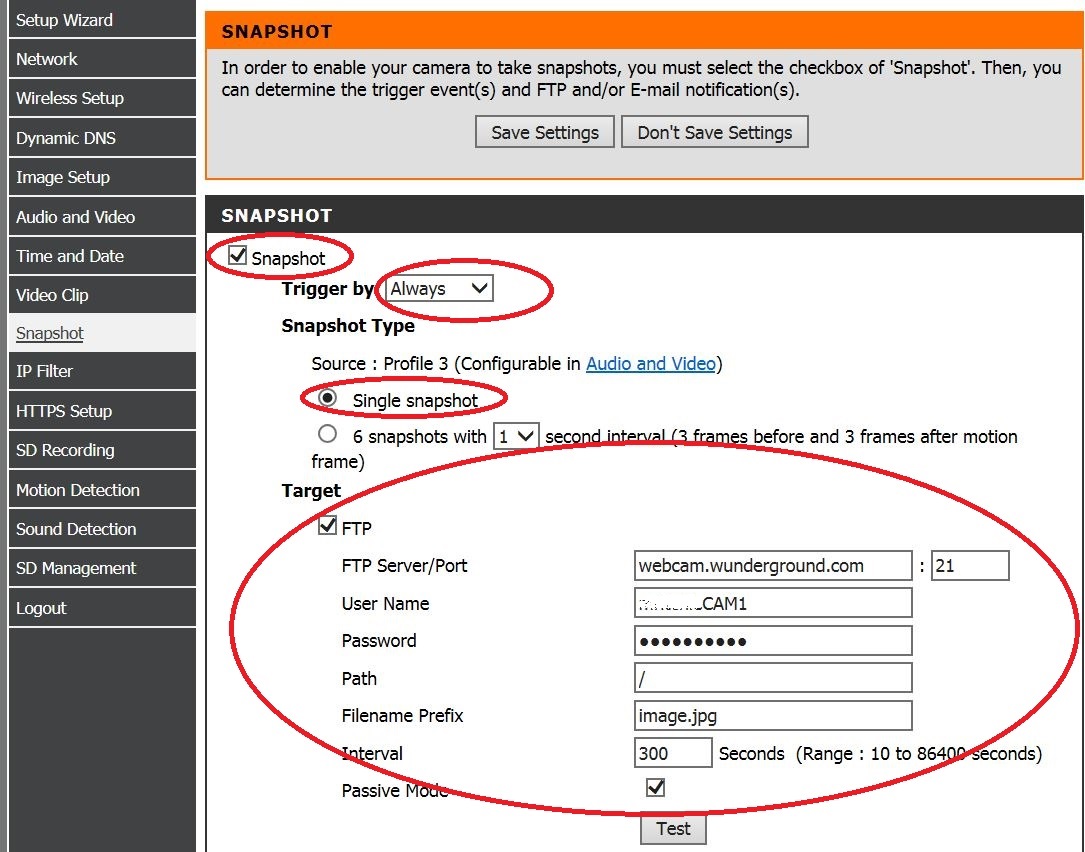
Step 2 - Tell the camera to take a photo every 5 minutes, and how to upload it (WeatherUnderground)
{click photo to enlarge}
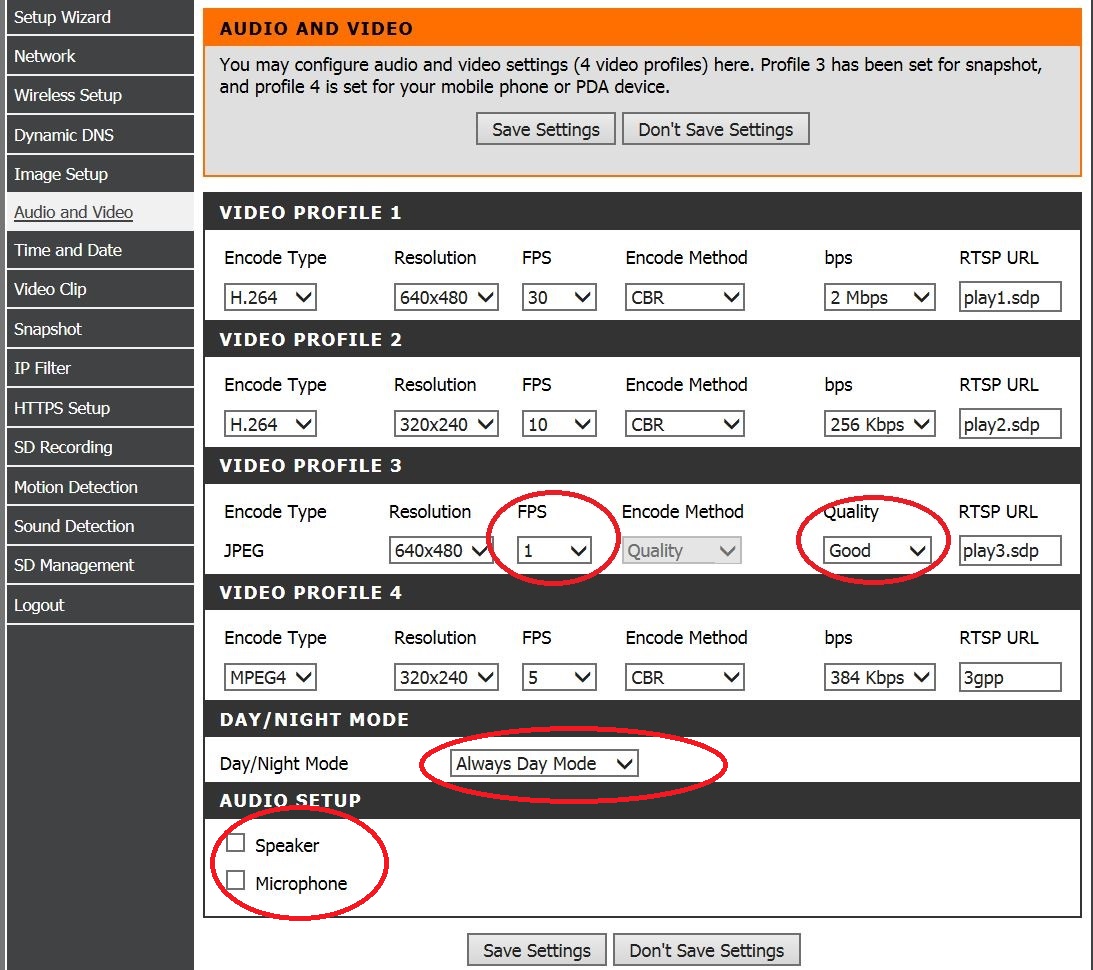
Step 3 - I set the FPS to 1 (still picture) and set the quality to "good" as a compromise between file size and quality. Set the Day/Night mode to "Always Day Mode" so that the Infrared emitter doesn't turn on at night (reflects off the glass window of the house). I also turned off the microphone in the camera.
{click photo to enlarge}
For those interested in trying a home webcam to upload to WeatherUnderground, but not sure where to start, below are the settings that I used. Maybe of inspiration or help if you decide to try this option. Just look for a camera that has FTP option, as many do. I used a DLink DCS-942L, which is an older camera that I had lying around.
Step 1 - I set the light source to "outdoor". This gave a better picture contrast, given as good as it gets with this low cost camera.
{click photo to enlarge}
Step 2 - Tell the camera to take a photo every 5 minutes, and how to upload it (WeatherUnderground)
{click photo to enlarge}
Step 3 - I set the FPS to 1 (still picture) and set the quality to "good" as a compromise between file size and quality. Set the Day/Night mode to "Always Day Mode" so that the Infrared emitter doesn't turn on at night (reflects off the glass window of the house). I also turned off the microphone in the camera.
{click photo to enlarge}